Manual Oral History Annotation Tool
Return to homepage
This page gives you instructions about how to use the Oral History Annotation Tool.
Each interview is devided into fragments. A fragment usually contains one spoken phrase. The Annotation Tool offers you the possiblity to search fragments for keywords, as with interview and time codes.
Select fragments
Search by word(s)
")
When you have confirmed the search request, a window will appear allowing you to select a fragment.
More information can be accessed by clicking the About search functions link.
The window that allows you to select fragments (left of the screen) can be hidden or displayed by pressing respectively Hide filter options or Show filter options.
Search by interview code

To see your selection, press Show selection on the bottom of the screen.
View fragments
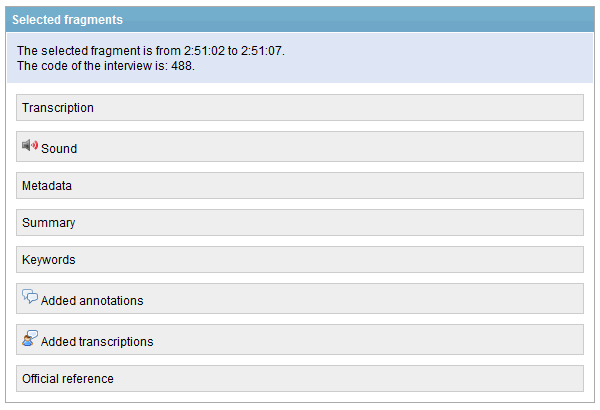
In the screen “Selected fragments” you can find the necessary information about the fragment. On top of the window, in the blue field, are the begin and end time and the corresponding interview code about the selected fragments. Below you can find the following information by clicking on the gray bars:
- Transcription The transcription of the selected fragment. This information is not displayed when the transcription is generated by automatic speech recognition.
- Sound Here you can listen to the selected fragment.
- Metadata More information about the interview the fragment belongs to.
- Summary Summary of the part of the interview (10 minutes) where the selected fragment belongs to.
- Keywords Keywords for the part of the interview (10 minutes) the fragment belongs to.
- Added annotations An overview of the added annotations by you and others to this fragment or an overlapping fragment. You can also add new annotations (possibly with one ore more attachments) here.
- Added transcriptions An overview of the added transcriptions by you and others to this fragment or an overlapping fragment. In this window you can also add a new transcription.
- Official reference Reference to the interview on the DANS website (via persistent identifier).
Add Transcriptions or annotations
With the tool you can also append transcriptions and annotations to a selected fragment. Examples below show the case for adding annotations. When you, while viewing the fragment, press the Added annotations or Added transcriptions bar the following window will appear:
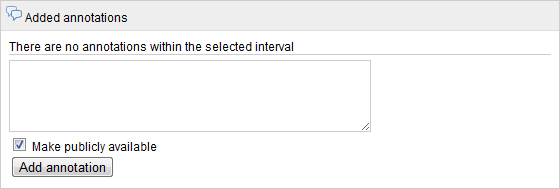
In the textarea you can enter an annotation (or transcription). You can choose whether or not you want to make it publicly available by checking or unchecking the 'Make publicly available' box. Only public annotations/transcriptions will be visible to others. By clicking 'Add annotation/transcription' this will be saved. Your entry will now appear above the input window, as is shown in this example:

A lock ( ) indicates that an annotation / transcription is not publicly available. With the buttons 'Edit' and 'Remove' you can respectively edit or remove your contribution. Also you can attach one or more files (for example documents or pictures) to an annotation. You can only change your own contributions.
Adjust time interval
When you want to adjust a time interval because you want to listen to a longer interval, you can use the following window in the left corner on the bottom of the screen:
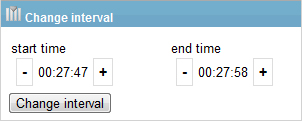
Here you can adjust both the start and the end time by using the '+' or the '-' button. In order to confirm your change, press Change interval.
Other tabs
The other tabs are My annotations, My transcriptions, All annotations, All transcriptions and Export.
My Annotations shows an overview of the fragments which you have added an annotation.
My Transcriptions shows an overview of the fragments you have transcribed.
All Annotations shows all fragments with an annotation added by you or others.
All Transcriptions shows all the fragments that you or others have added a transcription.
Export allows you to export all public annotations and transcriptions to an xml file.